Getting Started With ATTINY88 DEV BOARD
Hay Everyone,
I this blog I'm going to show how you can use ATTINY88 Arduino nano compatible development board with Arduino ide on Ubuntu operating system.
YT VIDEO LINK : https://youtu.be/te3z6Wy6Adk
First of all you have to add the Arduino core for attiny88 to your board's List.
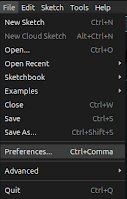
To do that copy the below link and paste it to your Arduino IDE location: File/Preference/Additional boards.
Link : https://raw.githubusercontent.com/MHEtLive/arduino-boards-index/master/package_mhetlive_index.json
After pasting click on OK to close the window and then Ok to close the Preference window, you will see a little notification will appear on the bottom right corner on your IDE which is detecting location you added.
Go to your boards manager (Click on Tools/Boards/Boards Manager) and start typing in the search line like "MH-ET LIVE BOARDS"
As shown in the image, install it and then open simplke LED blink code by clicking on the Files/Examples/Basic/Blink.
Then go to Tools/Boards and select MH-ET LIVE Tiny88(16.0MHz).
Then Click on "UPLOAD" button and you will see some instructions on the below "OUTPUT" window,
which says "Plug in device now...", plug int the board (time out is 60 seconds means you have to plug the board with the USB connected to your system within 60 seconds).
After plug in the board IDE will automatically detect it and upload the code in it.
If you get some errors something like the newer version as in below.
Then open a terminal on your system and run below commands one by one and try again. This will solve that error.
Thats all for now,
Thanks For Visiting.


Comments
Post a Comment